Have you ever opened a blank DAW session and spent ages naming tracks, setting up buses, and loading your favorite plugins, all before you’ve even touched a fader? This repetitive task can feel like a creativity killer. That’s where a mixing template comes in—a DAW template that instantly sets up your most-used tracks, effects, and plugins. Instead of starting each new project from scratch, you load a carefully prepared framework that allows you to focus on the creative aspects of mixing rather than the technical setup. This guide will show you how to build and use a mixing template in any DAW, why it’s so valuable, and how to keep refining it over time.
Table of Contents
- What Is a Mixing Template?
- Why Use a Mixing Template?
- Step-by-Step Guide to Creating a Mixing Template in Your DAW
- Using the Template for New Mixes
- Evolving and Refining Your Mixing Template
- Conclusion
What Is a Mixing Template?
A mixing template is a saved DAW project that includes a standard set of labeled tracks, buses, and commonly used plugins, all ready to go. When you load the DAW template, everything is laid out—drum tracks, vocal buses, reverb sends, maybe some light master bus processing—waiting for you to drop in your audio. Think of it as the blueprint of your session. You’re not locked into those settings; you can still customize and tweak. But you skip the chore of re-creating the same structure again and again.
Key Features of a Mixing Template:
- Pre-labeled tracks for each instrument (kick, snare, guitars, vocals, etc.).
- Buses or group channels (Drum Bus, Guitar Bus, Vocal Bus) with tracks routed appropriately.
- Insert plugins loaded at default or bypassed settings on channels that usually need them.
- FX sends and returns for reverb, delay, and other time-based effects.
- Optional master bus chain with a gentle compressor or EQ at neutral settings.
- Reference track channel routed directly to the master for quick A/B comparisons.
A template doesn’t do the mixing for you—it simply provides a familiar, organized starting point so you can begin balancing levels and sculpting sound without losing time on housekeeping tasks.
Why Use a Mixing Template?
By creating and loading a mixing template, you gain immediate benefits in both speed and consistency. Here’s why it’s so helpful:
Speed and Efficiency
One of the biggest perks of using a DAW template is how quickly it lets you dive into mixing. Rather than spending the first 20 or 30 minutes adding channels for each drum mic, creating buses, and loading your typical compressors or reverbs, you open a single file and it’s all there. You then drop in your raw tracks (or record them) and start shaping tones. Over multiple projects, these time savings add up, allowing you to work more efficiently and handle a higher project load or simply complete your own productions faster.
Organization and Consistency
A mixing template enforces a neat, structured session. Your tracks are labeled; your routing to buses is already in place. If you like your drum group to feed into a specific bus with certain plugins, that bus is there each time. This approach keeps your workflow consistent across different songs, ensuring your typical approach—say, a reverb for vocals or a parallel compression bus for drums—is always ready. You’re less likely to forget a crucial step, and you can maintain a recognizable “signature” sound from project to project.
Reduced Decision Fatigue
Mixing involves a series of critical decisions—adjusting EQs, compressing the right elements, balancing volumes—but it also involves a lot of small, non-creative decisions like “Which reverb plugin should I load?” or “Which bus number do I assign to the backing vocals?” Having a mixing template removes these minor setup choices. You don’t have to figure out your sends or re-insert your favorite compressor on every new track. Your mind is free to concentrate on artistic decisions.
Easier Experimentation
When your basic setup is already in place, you’re more likely to try out new ideas in the mix. You might experiment with different reverb lengths or push your parallel compression further because you aren’t bogged down by menial tasks. If the template is too rigid, you can always bypass or remove elements, but it’s there as a launching pad to get creative faster.
Step-by-Step Guide to Creating a Mixing Template in Your DAW
Whether you start with a well-mixed project or build from scratch, the process of crafting a mixing template is straightforward. You’ll set up tracks, buses, plugins, and effects the way you prefer, then save that structure as a DAW template. Follow the steps below to get a robust, time-saving session file you can reuse for every new mix.
Step 1: Start from a Finished Mix or Build from Scratch
One of the easiest methods for making a mixing template is to open a session you’ve already mixed and liked. Remove all the audio, leaving the routing and plugins intact. Alternatively, you can create a blank session, then add and label everything you typically need. Here’s how:
- Open an Existing Session (Optional): If you have a project with a well-organized layout and a sound you like, load it, delete all the audio regions, and rename any channels that might be too specific. This stripped-down session, with buses and plugins still present, becomes your template foundation.
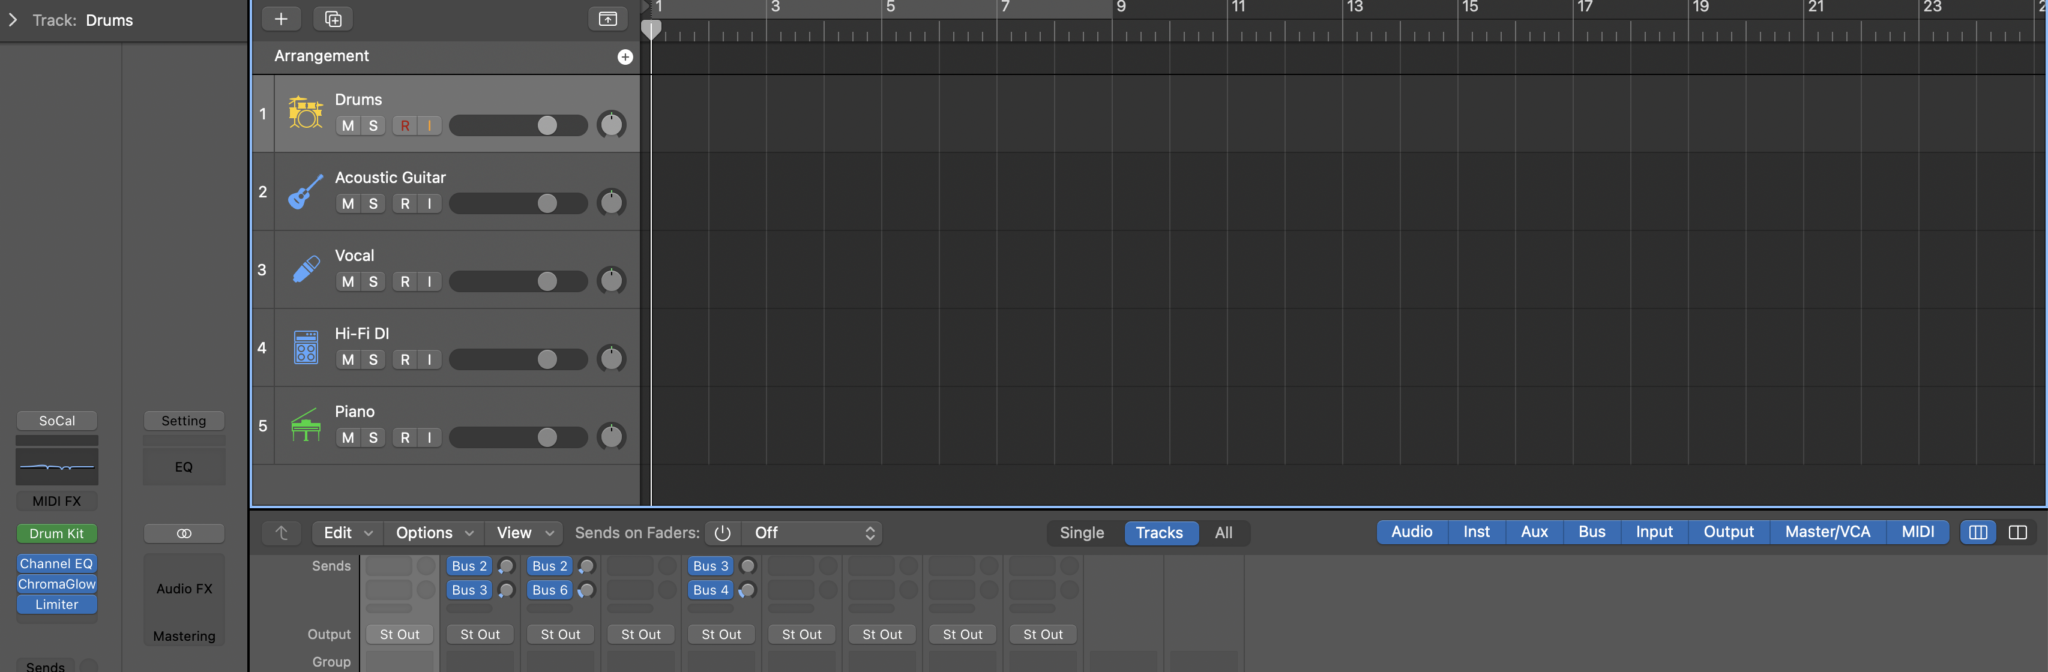
- Or Create a Blank Project: If you prefer a fresh start, open an empty session in your DAW. Create the audio tracks you need—kick, snare, overheads, bass, guitars, vocals, etc. Label them clearly. Assign them outputs to new buses, which you name “Drum Bus,” “Guitar Bus,” “Vocal Bus,” and so on.
- Keep the Layout Flexible: If you frequently work on rock tracks, add multiple guitar and drum channels. If you do a lot of EDM, you might create more software instrument tracks and sidechain routings. Your session should reflect the instrumentation and workflow you use the most.
By the end of this step, you’ll have a skeleton session with appropriate routing, naming conventions, and track order—saving you from re-creating the same grouping and labeling tasks over and over.
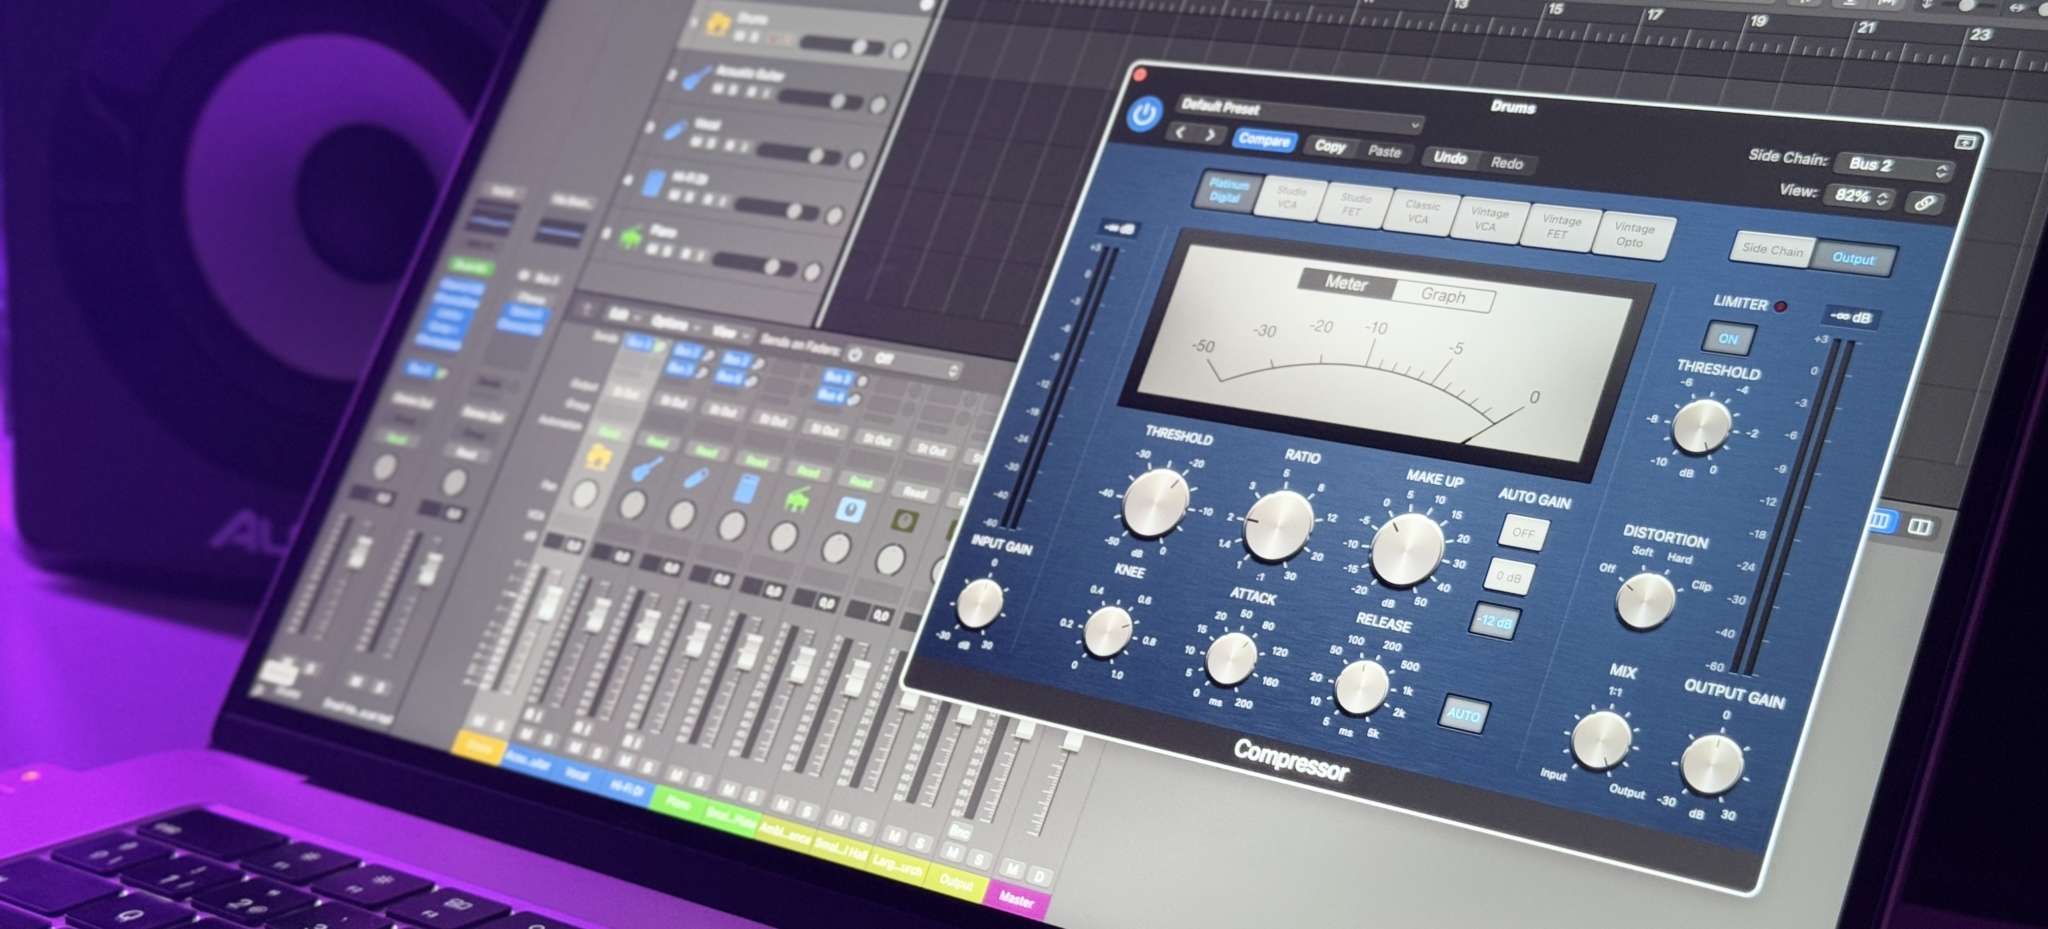
Step 2: Insert Common Plugins on Key Tracks
Next, place your go-to plugins directly into each track or group bus. This way, the tools you reach for in nearly every mix are already loaded. You can leave them bypassed or at neutral settings, so they won’t affect the audio unless you engage them.
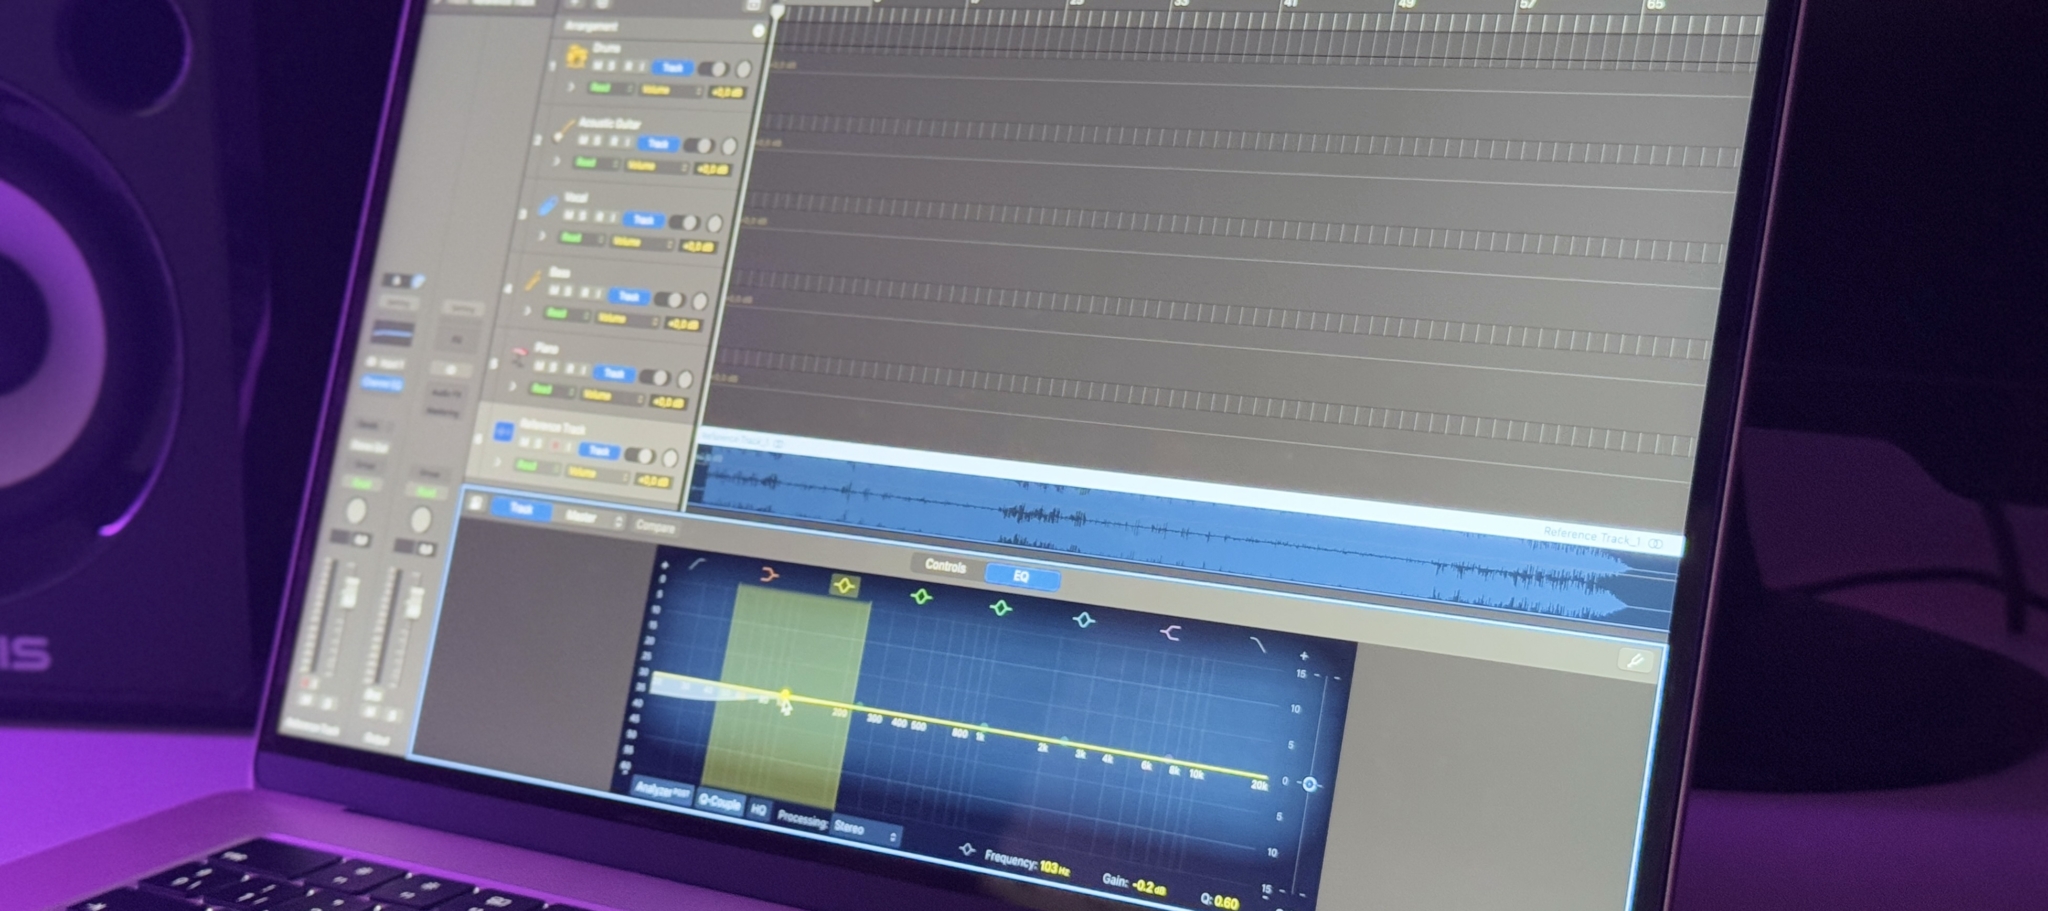
- Channel EQ on Every Track: Many engineers like a basic EQ on each channel for quick filtering or tone adjustments. You can apply a minimal high-pass filter or simply keep it bypassed until needed.
- Favorite Compressors: If you typically compress vocals or drums with a particular plugin, insert it on the relevant tracks. Dial in a simple preset or leave it bypassed.
- Specialty Plugins (Optional): Some mixers love a channel strip on each track (like an SSL-style plugin), or a saturator on the drum bus, or a tape emulator on the master. Place these in bypass if you want them as a quick option. The idea is to minimize future searching and insertion.
- Avoid Clutter: Don’t feel obligated to load every plugin you own into the template. Only include plugins you use on almost every project. If a plugin is seldom used, add it manually later.
When you reopen this mixing template, each track has the essential processing tools ready to go. Even if you don’t need them for a specific song, you can leave them off. The main advantage is speed and consistency.
Step 3: Set Up Sends and Returns (Reverb, Delay, Parallel Processing)
Most mixes call for reverb, delay, or other spatial effects. You might also use parallel compression or saturation on a bus. By pre-creating your aux sends and returns, you can simply turn up a send knob on any track to add it to an existing reverb or delay—no more halting your creative flow to configure a bus in the middle of mixing.
- Create Aux Returns: Add auxiliary channels for each effect. You might label them “Hall Reverb,” “Room Reverb,” “Vocal Plate,” “1/4 Note Delay,” etc. Insert the corresponding effect plugin, set it to 100% wet, and choose a preset you often use as a starting point.
- Name Clearly: If you do parallel drum compression, make a “Drum Crush” aux. If you have a go-to slap delay for vocals, label an aux “Vocal Slap.” Clarity of naming helps you instantly know where you’re sending a track.
- Optional Default Sends: Sometimes, you may wish to add a small default send to the vocal track for reverb or to the snare track for a drum plate. Keep that send muted or at -∞. When mixing, simply raise the send level for the desired effect.
- Parallel Buses or Additional FX: If you typically run parallel compression on drums, insert a compressor on a dedicated bus. Leave it bypassed until you’re ready. This preemptive setup ensures everything you rely on is just a click away.
Your mixing template now includes main time-based effects. Any track that needs a delay or reverb can route to an existing aux channel, significantly streamlining your workflow.
Step 4: Add a Reference Track Channel
A critical tool in intermediate and advanced mixing is the reference track. It’s a professionally mixed song you compare your work against to gauge tonal balance, loudness, and overall vibe. Including a dedicated reference track channel in your DAW template makes it easy to switch between your mix and a commercial mix without complicated routing.
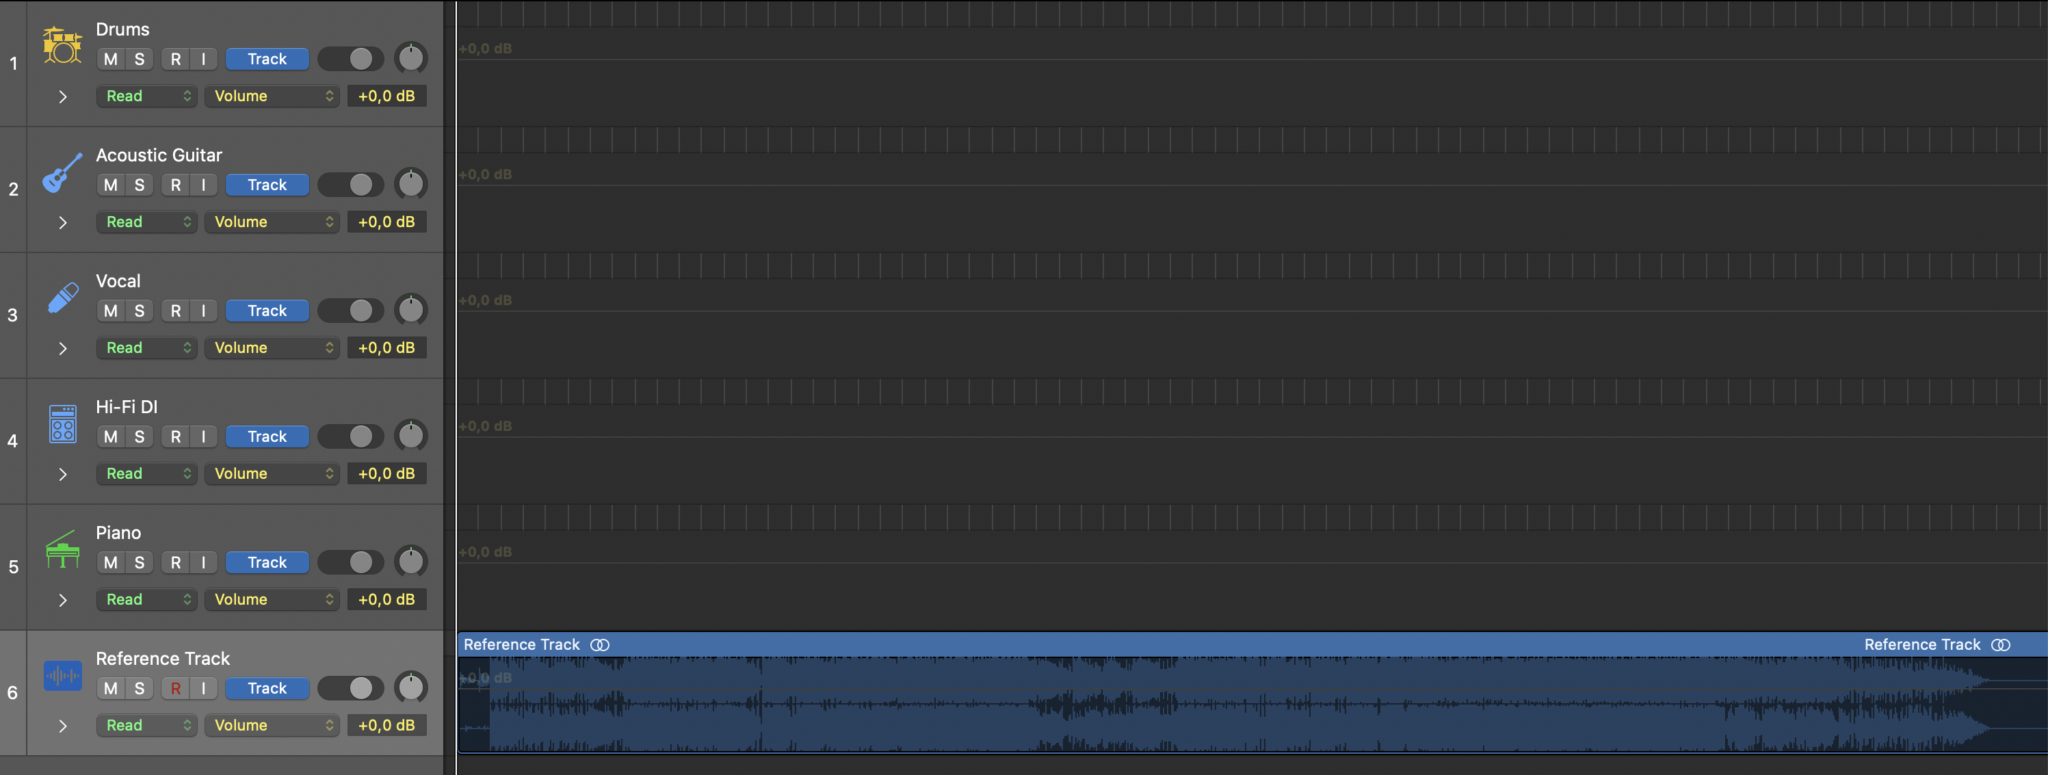
- Create a Stereo Audio Track Called “Reference”: Route its output directly to your main stereo output, bypassing any master bus processing. This ensures you hear the reference track uncolored by your mix-bus effects.
- Insert a Gain or Utility Plugin: This helps match volume between the reference song and your current mix. Level matching is essential for fair comparisons.
- Mute or Leave Empty: You can keep this track muted in your mixing template. When you’re ready to reference, drag in the commercial track you want to compare. Solo it or toggle between it and your mix to quickly assess how your mix stacks up.
Having a reference track readily accessible encourages you to maintain perspective. If your mix starts sounding too dark or muddy, switch to the reference track to see how they compare. This immediate feedback can guide your EQ, compression, and balance decisions.
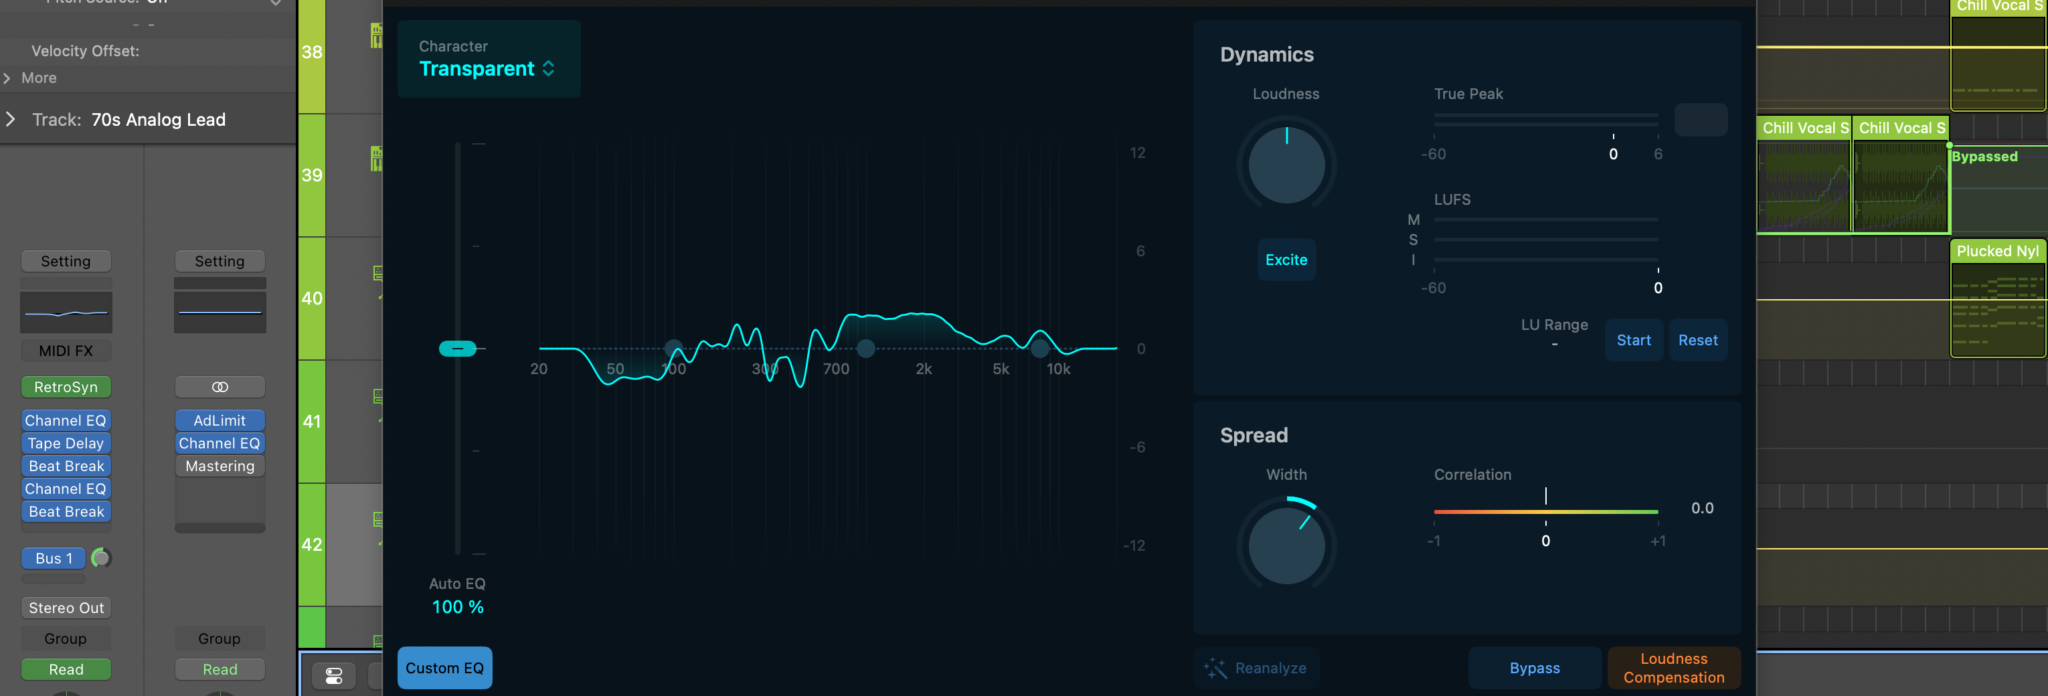
Step 5: Configure the Master Bus Processing
Some engineers like to insert gentle compression or EQ on the master bus from the beginning of a mix, while others prefer to leave it clean until later. If you’re the type who does “top-down mixing,” where you shape the overall sound through mix bus processing early, include your favorite master bus chain in your DAW template.
- Bus Compressor: For subtle “glue,” you might load a compressor on your stereo out. Set a neutral threshold so it’s not immediately grabbing. When you start mixing, lower the threshold to achieve the gentle compression you like.
- Master EQ or Saturation: If you typically add a touch of EQ (such as a high shelf or slight bass boost) or tape-style saturation, place it in bypass or at minimal settings. You can refine it once you hear the actual tracks.
- Limiter (For quick reference): Some engineers like to add a safety limiter at the end of the chain can protect your ears from loud peaks or help you bounce rough mixes at a hotter level. But we recommend leaving it bypassed unless you need it for demonstration mixes or quick references.
Mixing into a familiar master chain gives you a consistent sense of how channel-level changes affect overall tonal balance. Still, each song is different—use your ears, and don’t get locked into the same settings every time.
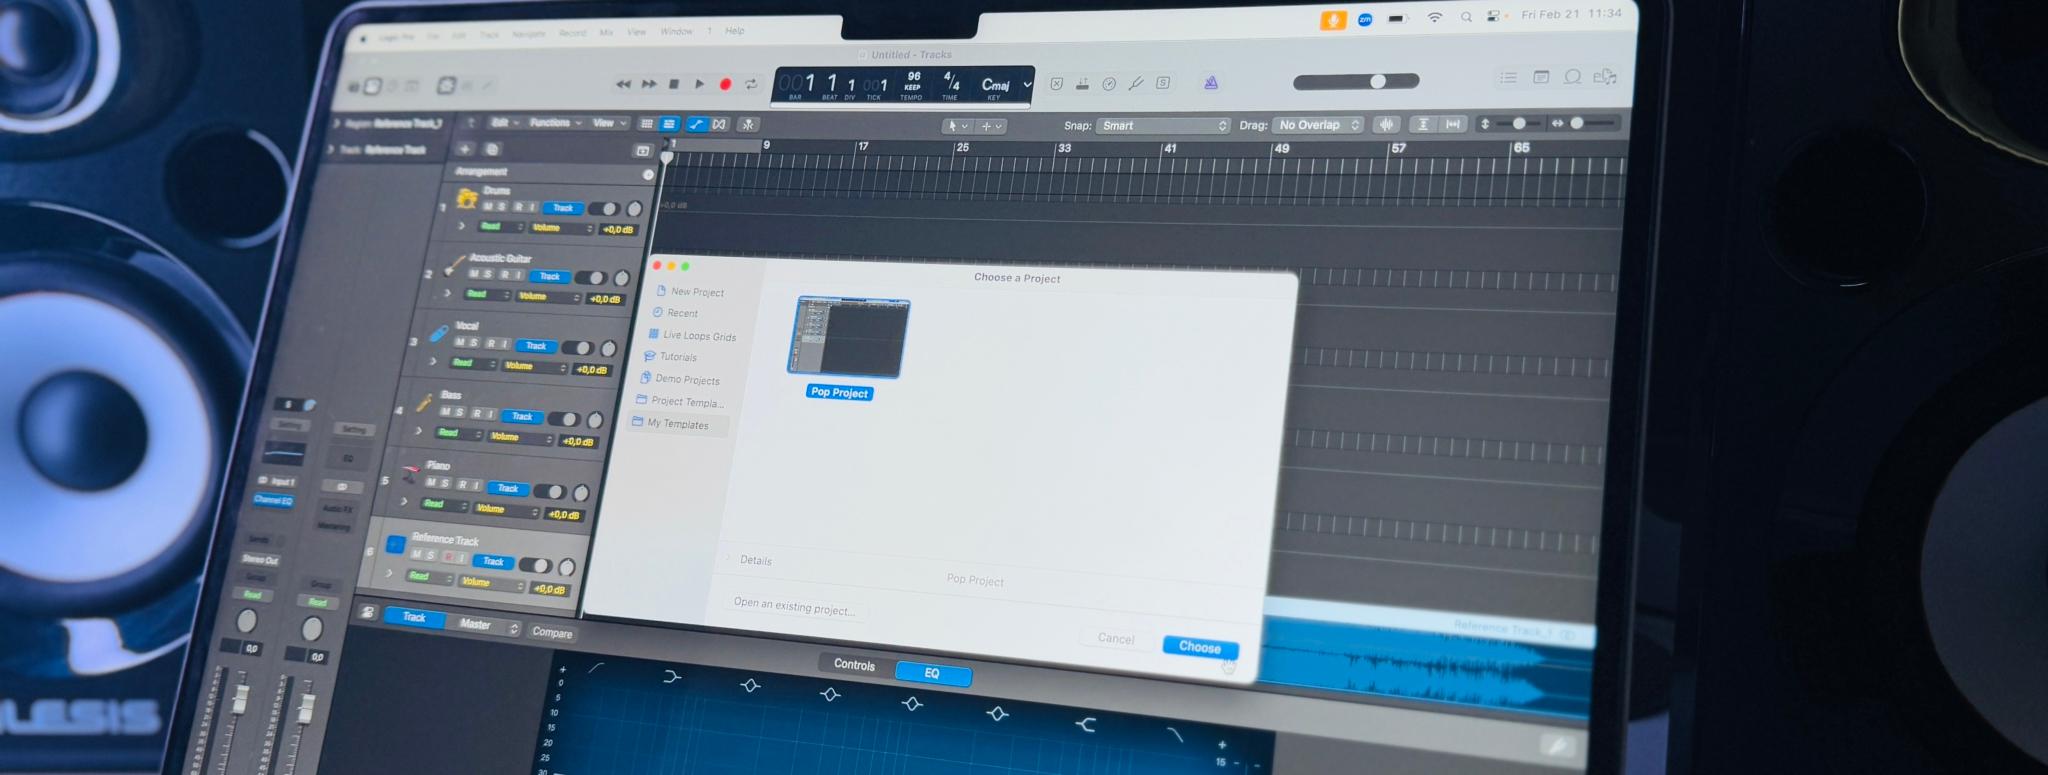
Using the Template for New Mixes
Once you save your mixing template, creating a fresh session is usually as simple as choosing it when starting a new project. Suddenly, you’re launched into a well-organized, plugin-ready environment. Here’s how to get the most out of that framework.
Importing or Recording Tracks
- Drag and Drop Audio Files: If you receive stems or multitracks from another source, simply drag them into the corresponding channels. Kick track goes to Kick, Snare top goes to Snare top, and so on. The routing is already done.
- Recording Directly: If you’re tracking a new band, record each mic input onto the designated track. You’ll immediately see and hear the benefit of pre-labeled channels plus any default processing if desired.
- Adjust as Needed: You might have fewer or more guitars than your template. Either delete unused tracks or duplicate any if you have extra guitar parts. Templates are flexible; they’re not meant to confine you.
Mixing Within the Template
- Enable/Bypass Plugins: If your snare needs compression, un-bypass the compressor on the snare track and tweak settings to taste. If it doesn’t need it, leave it bypassed.
- Dial in Effects: Want a lush reverb on vocals? Turn up the send to the “Vocal Plate” aux. If it’s too bright, tweak the reverb’s EQ. Because these channels are preconfigured, you won’t have to stop to create new buses in the middle of mixing.
- Check the Reference Track: Drop a commercial song into your reference track channel. Periodically compare it to your mix to see if your low-end is too heavy or your mix is missing sparkle. Remember to match volumes for a fair evaluation.
- Tweak the Master Chain: Adjust your bus compressor’s threshold or release as needed. If you had an EQ on the master bus, refine it based on the track’s requirements. Some mixes might thrive on a bit of gentle top-end boost, while others might not need bus processing at all.
Remember, the mixing template saves you from mundane setup tasks, letting you focus on the creative aspects of mixing.
Avoid “Mix by Numbers”
Although a DAW template speeds up routine tasks, it’s important not to let it become rigid. Mixing is a creative process; each track has its own character. Don’t rely on the same plugin settings just because they’re there. Use your ears. If a particular effect chain doesn’t suit a track, delete it or bypass it. The template is a tool for efficiency, not a formula for identical mixes.
Evolving and Refining Your Mixing Template
Your DAW template isn’t set in stone. It should evolve as you learn new techniques and discover better plugins or workflows. Periodically revisit and adjust it to match your current best practices.
Regular Audits
After several projects, examine your template with fresh eyes:
- Are there plugins you consistently bypass or remove? Remove them from the default setup.
- Are there new tools you always end up adding? Incorporate them to save time.
- Do you rarely use a certain reverb but always add a different one? Replace the old reverb in your template.
Updating your mixing template ensures you stay current and keep refining your efficiency.
Multiple Templates for Different Genres or Workflows
It’s often wise to have more than one DAW template if you tackle diverse genres. A heavy rock production might need a large drum setup, multiple guitar tracks, and parallel drum compression, while an electronic pop template might rely more on software instruments, sidechain compression, and different effects sends. Tailor each template to the style of music:

- Rock/Pop Template: Real drums, multiple guitars, parallel drum compression, overhead channels, etc.
- EDM/Pop Template: Software instrument tracks, sidechain routing, more bus-based effects, or advanced sampler setups.
- Podcast/Dialogue Template: Vocal processing, de-essers, noise gates, minimal musical channels.
Choose the best-suited template for each new project to avoid clutter or wasted time removing tracks and plugins you won’t use.
Versioning and Naming
You may want to maintain version numbers for your mixing templates. Each time you make a major change—like swapping out your default drum reverb or overhauling your vocal chain—save it as a new version (e.g., “Rock Template v2,” “Rock Template v3”). This way, you can roll back if a new setup doesn’t work as expected.
Adapting to Technology Changes
DAWs and plugins evolve quickly. If your software adds powerful new stock effects or changes how it handles buses, incorporate these improvements. The same goes for new plugins you acquire. Keep your template fresh and aligned with the latest advancements that improve your workflow.
Keep It Flexible
Avoid overloading your template with too many specialized tools. If you include every single plugin, your session might become cluttered. Stick to the core processes you regularly use. You can always add specialty plugins for specific projects.
Conclusion
A well-crafted mixing template is more than a time-saver—it’s a catalyst for creativity. By removing the mechanical tasks of setting up tracks and routing, you can focus on the art of mixing—shaping tone, balancing levels, and adding the nuances that bring a song to life. The DAW template provides a consistent, reliable environment from the moment you open a new session, helping you stay organized, confident, and more open to experimentation.
When you begin each project with your template, all the housekeeping—track naming, bus assignments, a reference track channel, favorite effects—are already in place. You can drop your audio or record your instruments and instantly start sculpting the mix. Reverbs, delays, compressors, and EQs are ready to go. A reference track channel keeps you grounded in real-world sonic standards, while a master bus chain guides your overall tone.
Remember, a mixing template is a living entity. As your mixing style evolves or your favorite plugins change, update your DAW template to reflect those shifts. You might end up with different templates for different genres or project types. The overarching goal is efficiency without sacrificing artistry. By streamlining technical setup, you free your creative energy for the decisions that truly matter—making your music sound its very best.
Embrace the concept of a mixing template, and let it turbocharge your workflow. Instead of drowning in routine tasks, you’ll ride above them, shaping vibrant, polished mixes in less time. With each project, you’ll further refine your setup, discovering the perfect balance between repeatability and spontaneity—allowing you to focus on what you do best: creating great music.
À propos de l'auteur

Dídac
PDG et fondateur de MasteringBOXDídac est un ingénieur audio professionnel, un producteur de musique et un ingénieur logiciel. Il est le fondateur de MasteringBOX et l'auteur de nombreux articles sur le blog.
Laisse un commentaire
Connecte-toi pour commenter.