I’m sure that if you are reading this, then you are probably quite familiar with mixing with EQ. Equalization is a basic staple of all music production. It’s used by producers tweaking synths all the way up to mastering engineers perfecting a mix. But are you familiar with the concepts of additive and subtractive EQ? If not, this article could be a huge help in fixing some of those recurring issues you keep having.
Additive vs Subtractive
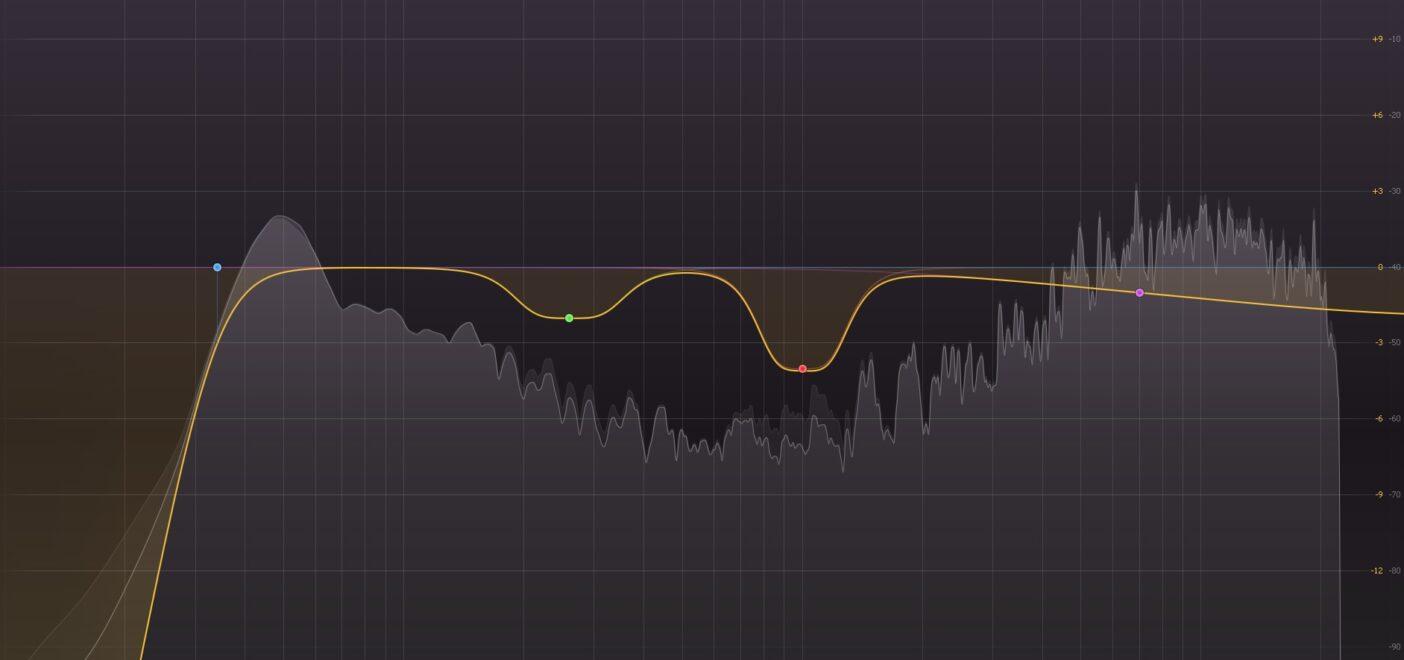
The basic principle here is equalization that either adds (boosts) or subtracts (cuts) decibels from a particular frequency range. When you want to add some brightness and air to a mix, you use additive EQ to shelf the high frequencies. When you want to remove the rumble from a vocal recording, you’ll use subtractive EQ to filter the low frequencies. A piece of cake, right?
Why Subtractive EQ Should Always Come First
More often than not, the tendency is to start boosting frequencies in order to hear more of what you want. Lifting some 80-150Hz on a kick drum can offer some real weight to the signal. However, if your mix has multiple bass/guitar/synth layers all stacked on top of each other, excessive boosting in these lower frequencies will lead to a muddy mix. Mud is never going to give you that perfect low-end you’re after. Instead, focus on cutting away unnecessary frequencies with subtractive EQ before adding your boosts.

Shelf out the frequencies below 40Hz to remove rumble. Apply a cut between 200-300Hz to add depth and remove boxiness/mud. Filter out everything above 6-8kHz that has no real use. Now that you’ve trimmed away all the unneeded frequencies, you should find that the 80-150Hz region we mentioned before sticks out without even needing a boost. Of course, it may still need some help to cut through the mix. By all means, add a boost to do so. But now that you’ve focused on subtractive EQ first, you won’t need as much of a boost, and you’re far less likely to encounter a mess later on in the mix.
Using Subtractive EQ To Control Your Sends
Most mixes are going to have at least one effects send. Whether it’s a type of reverb, a delay, or a multitude of complex modulation effects, you must be careful not to introduce additional mud into your mix. The choice to route a drum kit through a reverb is made based on the aims of the mix. However, when you send those drums through a reverb send, every frequency of the original signal will be affected. It’s unlikely that you’ll want to hear too much high-frequency reverb. This area of any mix is normally the first to become unpleasant to the ear. For more info on this, you can check out this PDF on the science of hearing. We can combat this by placing an EQ after our reverb. We can then use subtractive EQ to remove frequencies that we don’t want to hear from the reverb. This might be a filter to remove the low end or a cut of a few dB around 10kHz to minimize excessive brightness. For more info on identifying unpleasant frequencies, check out this PDF on the science of hearing.
Frequency Masking
This is something I mentioned recently in an article that explains how to utilize side-chaining to solve frequency masking. Frequency masking itself occurs when two sounds occupy the same area of the frequency spectrum and fight each other for dominance. Examples of this can be heard in the clashing of vocals and electric guitars, or kick drums and sub-bass synths. This is where subtractive EQ really comes into its own.
We often make cuts to remove frequencies from a signal in order to improve presence, clarity, and sound quality. However, sometimes we must make sacrifices in order to keep a clean mix. The simplest way to make decisions when it comes to frequency masking is to decide which element is the most important to your mix. For instance, let’s say you’re working on a jazz arrangement with a large brass section. You’ve got horns, trumpets, trombones, and saxophones all fighting for space. You’ve applied some panning and level adjustments to spread them out, but you’re still struggling to position that sax solo on top of everything else. By studying the key frequency range that the sax operates within, we can make wide cuts of 1-3dB from all the other brass. This will leave a lovely hole that our sax can occupy all to itself.
Building Headroom Into Your Mixes

By focusing on subtractive EQ and potentially ignoring additive EQ altogether, you will find that you have a much easier time when it comes to preparing your mixdown for mastering. By concentrating on removing instead of adding, you have cleared out every ounce of unnecessary information in each signal. Not only that, but you’ve actively mixed every element down through your EQ choices. Just make sure not to overdo it, as mastering engineers won’t be able to add back in what you have removed.
TL;DR
Subtractive EQ should always come first before you start making big boosts all over your mix. If you’re having a hard time making your mix sit right and you’ve got elements clashing and fighting for space, chances are you need to go back and re-evaluate some of your EQ choices. Keep an eye out for frequency masking and aim to use EQ to clean your mixes instead of adding in the missing information. Mastering subtractive EQ along with setting appropriate levels and utilizing panning can lead to some pretty impressive rough mixes. Having this starting point in a mix and being able to get to it quickly is invaluable.
À propos de l'auteur

Tim Dunphy
Ingénieur audio et rédacteur de contenu spécialiséPlus de 10 ans d'expérience dans le domaine de l'audio. Tout, de l'enroulement de XLR au mastering d'albums. Je suis un self-made-man et je garde mes actifs en bitcoins. Qu'y a-t-il de plus à savoir ?
Laisse un commentaire
Connecte-toi pour commenter.


