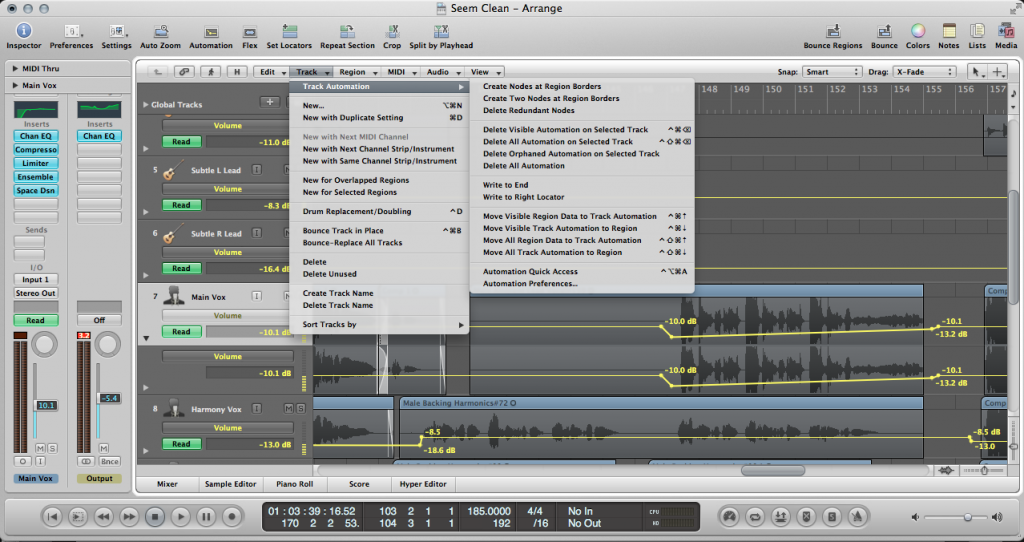
Today, just about every aspect of recording, mixing, and mastering can be done in the digital space. As a result, the DAW has become an engineer’s best friend. It’s just a matter of figuring out which DAW is best for you. These programs have changed the way we produce music from start to finish. One major improvement DAWs have made since their arrival is the introduction of mix automation.
In the past, any dynamic changes in gain, fading, panning, etc. needed to be made manually. In other words, the engineer or producer would have to manually alter these aspects of the mix while recording. With mix automation, the DAW handles this for you, as long as you set the parameters. Here’s how to use mix automation in your DAW.
Select A Track For Mix Automation
Before you do anything, you have to decide which track you wish to automate. For instance, let’s say you want your lead guitar track to get louder and quieter during a certain part of the song. You would begin by selecting this track, then selecting “Automation.” In Logic Pro, the shortcut for automation is the “A” key. Automation can also be accessed by selecting “Track” and then “Track Automation.”

Decide What Type of Automation You Want
Many aspects of the track can be automated, such as volume, panning, gain, EQ, compression, and much more. If you automate panning, the track can phase between left and right in stereo for a certain portion of the song. If EQ is automated, the entire track can enhance or remove certain frequencies at a given point. No matter which type of mix automation is used, the effect will be to add dynamics and intrigue to a part of the track. For our lead guitar track example, we’ll stick to automating its volume.
Setting Up The Automation
To begin, you’ll want to set a node at the part where you wish the automation to and another where it ends. From you can manipulate the line between these points. Other points can be added this line to further alter the degree to which an aspect of the track changes. For our lead guitar example, a node would be placed where we want the guitar’s volume to start changing.
Let’s say we want the volume to start and end at the same level. If this is the case, the first and last nodes should be at the same level. We’ll need to add nodes along this line to create peaks and valleys, allowing the volume to go up and down. If we want our volume changes to be consistent, the peaks and valleys should be spaced evenly apart. If we want a more sporadic change in volume, we can randomly place nodes across the line. Likewise, if the spikes and dips are too extreme, we can lower the nodes, thereby reducing the angles between them.
Conclusion
The great thing about mix automation is how much it simplifies the mixing process. By listening back to your parameters, you can decide what works and what needs to be changed. And remember to listen to the track in context with the rest of the mix before deciding you’re done!
À propos de l'auteur

Ethan Keeley
Rédacteur, chanteur, musicien et monteur audioEthan Keeley est un musicien, un doubleur et un écrivain de Rochester, dans l'État de New York. Lorsqu'il n'est pas en tournée avec son groupe Unwill, il travaille sur de nouvelles chansons et histoires.
Commentaires
Perfeito!
Thank you
Laisse un commentaire
Connecte-toi pour commenter.


