Virtually every industry and specialty boasts its own jargon. The ever-complex realm of music is no different, especially when it comes down to mixing and mastering. In this article, we’ll be specifically tackling audio mixing and mastering terms, from the rather self-explanatory to the obscure and confusing. If you’re interested in exploring similar glossaries, make sure you check out our articles where we explain audio recording terms and audio effects terms.
If you are looking to brush up on your audio mixing terms or audio mastering terms, this is the right place. With a good grasp on these audio terms tou will be able to communicate effectively with clients, engineers, and producers. Even if you’re simply hoping to get better at mixing and mastering, following tutorials and guides. This glossary is just what you need. If you are a beginner, make sure to first understand what is mixing and what is mastering. If you already know them and the differences between mixing and mastering, dive into the glossary.
Feel free to bookmark this page and use it as a reference point to come back to for any technical terms or slang you come across. To make the glossary slightly more digestible, we’ve divided it into 4 sections. You can skip to individual sections by following the links in the table of contents.
Table of Contents
- Audio Mixer Components
- Digital Audio Mixing Terms
- Mixing techniques
- Parameter & Processor Terms
- Terms
- Conclusion: Audio Mixing & Mastering Terms
Audio Mixer Components
Auxiliary channel (or aux channel) – a channel or track that doesn’t contain any audio but generally has audio sent to it for processing.
Bus – a path in which sound signals can travel.
Track busses – a collection of paths for the signal to travel.

Bypass – this is when an effect is temporarily disabled, typically via a button or switch, so that you can hear the audio without the effect.
Channel – similar to a bus, this is a pathway via an audio device.
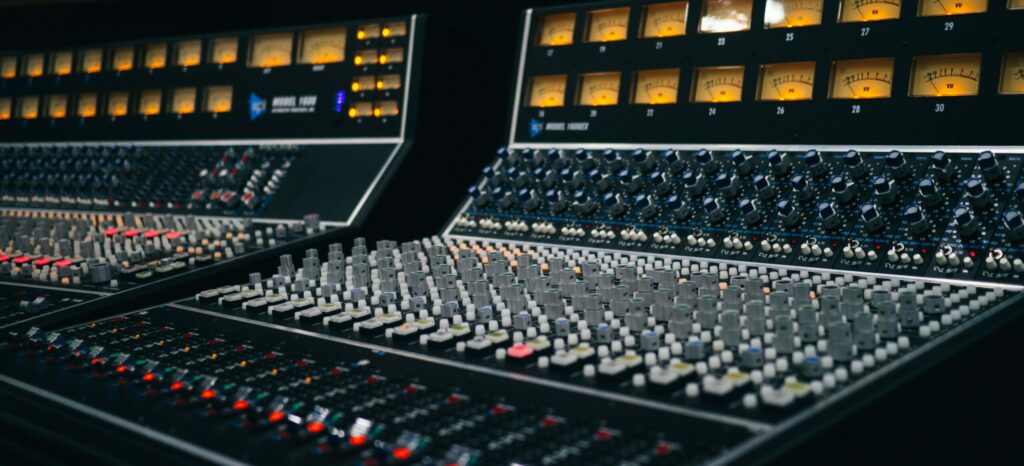
Console (or mixing desk, mixer, sound board) – a device that combines and routes audio signals from many sources to various destinations. It’s essentially the studio version of a DAW.
Fader – a fader is the part of the channel that controls volume. Whilst knobs are always circular, faders are always in a straight line.
Gain – another word for volume. Although many use it when referring to distortion.
Group faders – groups faders are helpful for controlling multiple channel faders at once.
Meter – meters help to measure and evaluate the level of a signal in various different ways, such as providing useful information about loudness or stereo image.
MIDI – acronym for Musical Instrument Digital Interface. It refers to the notes and other data, such as parameter controls, recorded when using software instruments.
Mix bus (or submix, stereo output, mix output, or master output) – this is the channel to which all of the audio of a session flows.

Mono – the opposite of stereo; a mono sound has one source, rather than two.
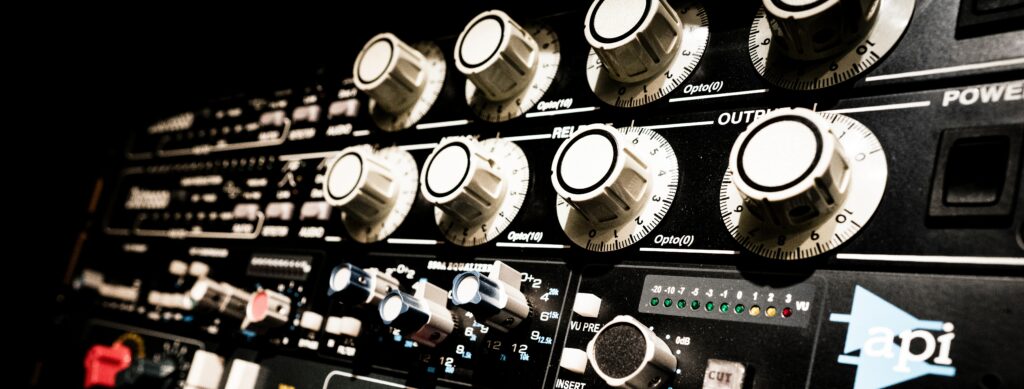
PAD – acronym for passive attenuation device. As the name suggests, the purpose of this device is to attenuate, or reduce, the input volume of a piece of hardware.
Pan – this is the process of moving a sound to the left or right in the stereo field. A knob used to achieve this is called a pan pot.
Patch bay – a patch bay is a central hub hardware device that connects and allows you to control all your inputs and outputs.
Phantom power – this is a button/setting present on audio interfaces and mixers that power condenser microphones with a +48V of power to input if required.
Polarity – this is the direction of the waveform. If you “flip the polarity”, it turns the waveform upside down. Essentially, the positive excursions become negative and the negative excursions become positive.
Signal flow – signal flow describes the path audio takes from its source to the output e.g. compressor -> distortion -> EQ -> output.
Stereo – opposite of mono; any sound that contains both left and right channel information.
Tonal balance – the distribution of energy or tone across the audio spectrum.
Digital Audio Mixing Terms
Bit depth – bit depth measures the accuracy of a program. In other words, it describes the resolution of the sound data in an audio file. The higher the bit depth, the more accurate the output.
Bounce – bouncing refers to the summing of different audio sources before exporting them as a single audio file.
Buffer size – buffer size determines how quickly a computer processor can process the input and output information. Smaller buffer sizes result in lower latency but are more prone to crashing, and vice versa. Typically you would set it very low when recording and high when mixing.

DAW – this is an acronym for Digital Audio Workstation. It’s software that allows you to record, edit, mix, and master. Popular examples include Ableton Live, Logic Pro, GarageBand, and Pro Tools.
Headroom – headroom is the amount of volume a channel can handle before distorting. The louder the sound, the less headroom it has.
Latency – latency describes the amount of delay between the input and output of a signal. It usually occurs when there are too many plugins on the session.
LUFS – this audio mixing term refers to units of audio loudness; it’s the standard scale for streaming services.
Plugin – a piece of software that you can use in conjunction with your DAW to increase its functionality. They can help you create, enhance or analyze music.
Processors – processors are any hardware or software that can alter the shape of an audio waveform. They can change the pitch, loudness, speed, or tone, among other things, of a sound.
Sample rate (or resolution) – sample rate refers to the number of samples taken per second. The higher the sample rate, the higher the quality of the audio, and vice versa. However, higher sample rates result in larger audio file sizes.
Send – a routing function in DAWs that allows an audio file to be sent to a return for processing in parallel with the original signal.
Sequencer – you can use a MIDI sequencer to compose, edit, and play MIDI sound sequences.
Stems – stems are isolated audio tracks that have been layered together.
VST – this audio mixing term stands for Virtual Studio Technology. VST is an industry-standard plugin software extension simulating hardware in software form.
Waveform – an audio signal represented visually as a wave.
Mixing techniques
Additive synthesis – a sound synthesis technique that creates timbre by mathematically adding harmonics (sine waves) together.
ADSR – stands for attack, decay, sustain, and release. These four parameters are controlled to modulate a sound envelope over time.
Attenuation – attenuating is the lowering of the loudness of an audio signal. It’s typically measured in decibels (dB).

AU – acronym for “audio unit”. A format of plug-in. Apple equivalent of Steinberg’s VST.
Automation – automation describes the modulation of a parameter over time, such as volume or pan, that you can record into the arrangement of a track and it’ll automatically adjust the parameter once recorded.
Clipping (or peaking) – a form of distortion which occurs when a channel has too much volume being sent to it and the audio peaks above the headroom. Analog clipping is referred to as soft clipping, which is more desirable than hard clipping, which is unpleasant digital clipping.
Comb filtering – comb filtering describes frequency cancellations in intervals that tend to occur due to a delay between multiple identical signals which are combined.
Comping – this audio mixing term involves taking several takes of a recorded vocal or instrument and combining the best parts of each recording into one single track.
Consolidating – consolidating refers to the rendering or joining of individual clips on a track into a single audio clip. Typically done to preserve alignment when exporting tracks or stems.
Doubling/dubs – recording a part multiple times and then layering them to get a thicker and fuller sound. Common with vocals.
Envelope – Envelopes refer to the modulation source which can affect the character of a sound (e.g. volume, filter) as it changes over time.
Gain staging – this is the process of balancing levels at every point in your signal chain for the best signal-to-noise ratio. You want to ensure that the volume stays the same after using a plugin and that all the recordings in a session are relatively the same volume.

Null test – the null test involves mixing two supposedly identical signals with the polarity of one signal flipped. If they truly are identical, they will cancel out, or null, and create zero output.
Imaging – imaging refers to the process of and ability to accurately position or distinguish signals in the stereo field (i.e., in the left-to-right stereo image).
Layering – as the name suggests, layering involves placing/playing two complementary or contrasting sounds at the same time. The result is a unique and/or fuller sound.
Masking (or collisions) – this is when it becomes difficult to distinguish between two sounds because they are present in the same frequency range. You typically want to avoid these collisions so that your instruments can sit well in the mix.
Multi-track recording – multi-track recording involves recording each element, e.g. each instrument or vocal, in isolation one at a time.
Panning – this audio mixing term refers to the process of moving a sound either left or right in the stereo field. Typically used to create width and space.
Parallel processing – applying processing to a copy of an original sound signal and then mixing it back in with the original.
Preset – a saved collection of settings that can be loaded into an instrument.
Resonant peaks – these are peaks, or boosts, in specific frequency responses, typically created with a filter.
Sidechaining – a form of compression that uses a second input as a trigger for the threshold. Used regularly with kicks and basses to make the bass duck in volume when the kick hits.
Parameter & Processor Terms
ADSR Envelope Parameters
Attack – this is a time and amplitude-based parameter and it’s the first component in the acronym ADSR. It describes the time it takes for a sound signal to rise from a volume of 0 to its maximum amplitude, in milliseconds or seconds.

Decay – this is a time and amplitude-based parameter and it’s the second component in the acronym ADSR. It refers to the amount of time taken for a signal to fall from its maximum amplitude to a specified sustain level (in dB).
Sustain – this is an amplitude-based parameter and it’s the third component in the acronym ADSR. Sustain describes the steady amplitude level when you hold down a key.
Release – this is a time and amplitude-based parameter and it’s the fourth component in the acronym ADSR. Release determines how long a sound will take to decay to silence once the key is released.
EQ Terminology
Bandwidth – this is the range of frequencies in an audio signal or stream.
Filter – a feature of an EQ that will cut the sound of the low end or high end of the frequency spectrum. These are known as High Pass Filters and Low Pass Filters, respectively.

Hertz (or Hz) – a measurement of a frequency in cycles per second.
Highs – also known as treble; the highs are the sounds in the upper end of the frequency spectrum, typically from about 2.5kHz and higher.
Kilohertz (or kHz) – kHz is an abbreviation of kilohertz. 1kHz = 1000Hz.
Lows – the low-end is also called bass and it refers to the lower frequencies in the frequency spectrum, typically from 25Hz-350Hz.
Mids – the mids are the central range of frequencies from around 500 Hz to 2000 Hz.
Q – Q is the width of a band in an EQ.
Room resonances (or standing waves) – this audio mixing term refers to the collection of resonances that occur within a room. These frequencies can mask various elements in your mix so it is important that you cut them out using an EQ.
Spectrum analyzer – a spectrum analyzer is a visual graph displaying the frequencies of real-time incoming audio signals.
Compression Terminology
Attack – the attack controls how quickly the compressor kicks in to reduce the volume of the audio.
Knee – a compressor’s knee setting controls the rate at which compression is applied just as the attack setting controls the speed.

Makeup gain – this parameter allows you to boost the output amplitude of a sound processor that made the input sound quieter. This is useful with compressors as they often decrease a sound’s volume so you can use makeup gain to keep the sound at the same original amplitude.
Noise gate – noise gates cut off the volume of a sound as soon as it drops below a certain amplitude threshold.
Ratio – the ratio parameter controls how hard a compressor clamps down on the audio’s volume.
Release – the release refers to how long it takes the compressor to stop compressing the sound, typically in milliseconds.
Threshold – the threshold sets the decibel level at which the compressors kick in to start compressing the sound.
Delay & Reverb Terminology
Damping – with respect to reverb, damping is the softness of the emulated room.
Decay – how quickly a sound fades from a certain amplitude.
Diffusion – how dense and close together the reflections are.

Dry/Wet – this refers to the amount of processing you are applying. Dry means unprocessed, Wet means processed.
Feedback – a delay parameter that determines how long the delay lasts after you play a note.
Pre-delay – how fast the reverb begins after the triggering sound.
Audio Mastering Terms
Types of Audio Mastering
Standard mastering– standard mastering is a stereo mastering, which is the traditional and most common form of audio mastering. You carry out this type of mastering on a single and final stereo mix file whereby any processing affects the entire mix.
Stem mastering – stereo mastering is a newer type of audio mastering that involves mastering the track in various groups or stems (see stems), rather than one single mix. Thus, any processing done does not have to affect the entire mix.
Vinyl mastering – this is audio mastering specifically for vinyl. It’s important to create a separate master for vinyl format from digital in order to avoid distortion and mechanical playback issues.

General Audio Mastering Terms
Attended / Unattended – this is whether the audio mastering is done with the artist in the session, or the engineer does it on their own.
Album sequencing & spacing – this involves ensuring that all the songs in an album flow together.
Audio restoration – the process of removing imperfections, such as pops and clicks.
Bit rate – the number of bits of data transferred per second.
Digital signal processors – DSPs describe the electronic manipulation of audio signals.
Dithering – this audio mastering term is the addition of white noise to decrease distortion when you export the recording at a lower bit rate.
Dynamic Range – the difference in decibels between the peak level and the average level.

Expanders, Enhancers & Aural exciters – these all accentuate particular parts of an audio signal to enhance the sound when mastering.
Metadata – information about the song embedded into the table of contents for the file.
Peak Level – this audio mastering term refers to the loudest point of the track at any given moment.
Revisions – revisiting a master to make specific changes.
RMS – root-mean-square. This is a metering tool that measures the average level of the track taken across an amount of time.
Signal-to-noise ratio – this refers to the ratio between how much desired vs undesired sound is present in audio recording, i.e. the level of signal power vs level of noise power.
Conclusion: Audio Mixing & Mastering Terms
Hopefully, this glossary has helped to clear up a few confusing audio mixing and mastering terms. If you’d like to explore some of the terms in more depth then you can follow their respective links (that is, if they are linked) which will take you to articles we’ve written specifically about that mixing term or topic, or it’ll be an external link to another webpage explaining the concept.
Equally, feel free to explore and learn about music production in our learning center, or sign up for our newsletter by creating a MasteringBOX account, to explore more mixing and mastering articles. Thanks for reading and happy mixing!
About the Author

Joe Curtis
Digital Marketer and Content WriterJoe Curtis is a passioned Digital Marketer from the UK. In his time on MasteringBOX he has created amazing content about Audio and Music Production.
Comments
“Stems – stems are isolated audio tracks that have been layered together.” What does “layered” mean? Shouldn’t it be in the glossary? If an audio track isn’t “isolated”, what is it? Combined? Is there a term for “unlayering”? (e.g going from a stem back to isolated tracks?) Is a “mix” a “stem”?
“Send – a routing function in DAWs that allows an audio file to be sent to a return for processing in parallel with the original signal.s” What is a “return”. Actually I think I know. It’s what comes back from what you “sent” to. So you send to something, and it returns something. You don’t send to a return.
Leave a comment
Log in to comment


