Modern technology is a wonderful thing. It’s allowed us to create incredible music with the most interesting and weird effects. No longer are we limited to only using four tracks. No longer are PCs unable to handle more than five plugins at once. Stereo, quadraphonic, surround sound, and beyond let us position elements wherever we choose to create the most immersive experience possible. However, all of these amazing tools tend to lead us toward ignoring some of the most fundamental issues. We become too infatuated with fancy stereo effects, which distract our ears from basic concepts such as balancing levels and frequencies. It’s also all too easy to ignore phase relationships in stereo and end up with washed-out mixes that lack power. Today’s article aims to take a step back in time and reconnect us with an old but still incredibly relevant concept: mixing in mono.
Phase Cancellation
Phase cancellation is often misunderstood, much like the difference between mixing and mastering. It’s a bit of a dark art for some and can be tricky to fully understand—and even trickier to learn to hear. In simple terms, phase cancellation occurs when two signals of the same frequency are out of phase with each other. Thinking about the sine wave, if we have a peak from one signal and a trough from another, they are exactly 180 degrees out of phase, and so when combined, they will cancel each other out.

Similarly, when we have two signals of the same frequency that are 90 degrees out of phase, we will end up with partial cancellation. While not as severe as full cancellation, it will result in the loss of some signal and a generally weaker sound. There are many great phase alignment plugins available these days, so there’s no need to worry if you struggle to do this by ear. However, a great way to practice and check the phase alignment of your tracks is by mixing in mono.
Mixing in mono consolidates all signals into one channel, helping identify phase cancellations where certain elements may diminish or disappear completely. This is very common in tracks that use time-based delay effects like chorus, flanging, or double tracking. These effects create their stereo spacing by utilizing phase alignment and placing clones of the same signal slightly out of phase with each other. This gives the perception of width as your ears hear the two signals at slightly different times. Unfortunately, this means that when you fold your track in and try mixing in mono, you’ll likely lose the original signal completely.
So You’re Releasing in Stereo?
Now you might ask, why does this even matter? I don’t intend to release or play my songs in mono, so who cares? While you are correct that it’s unlikely you’ll ever release your tracks in mono, that doesn’t mean that people won’t listen to them as such. Many nightclubs set up their systems in mono to avoid phase cancellation and dead spots as people move through the venue. If your track is going to be played in a venue and your vocals are mixed with double tracking, it’s possible that they could completely vanish in the club. Equally, many people listen to music on laptops or phones these days. While many of these devices do have two speakers to reproduce stereo audio, they are often so close together that the brain cannot perceive the stereo separation and time delays in stereo widening effects. This means that they are essentially listening in mono, and coupled with the generally poor quality of most phones and laptops, this could severely impact your music.
Mixing in Mono for Extra Width in Stereo
One common question I get asked is how to make tracks sound wider. Your pan pot only goes so far, and introducing stereo widening effects can have pretty dire consequences. My answer to this question is simple: Context. If you’ve hard-panned your drum mix but want your guitars to sit even wider, the easiest way to achieve this is to narrow your drums. There is no rule that says drums must be panned hard left and right. It’s really all in the planning. The other thing that really helps with width is depth in your mix. This is where mixing in mono comes in handy again.
In a mono mix, you have no panning and therefore no way to make things sound wide. As a result, the only tool you have at your disposal is depth. Pushing elements backward in the mix by using levels and reverb is how you’re going to make certain elements stand out and sound bigger and faux-wider. If you can work on making your mix sound clean and wide in mono, then you’re on your way to a wider mix before you’ve even started. Try mixing for width in mono, then moving to stereo, and see how it improves your stereo field.
Cleaning up the Clutter the Right Way
Mixing in mono is a fantastic way to learn to clean up your mix without relying on panning. When you have too many signals in the same frequency range and your mix is getting super muddy, it’s easy enough to just push things off to one side to solve it. While this does work, it’s often going to result in a looser sound that requires more work to pull together. The reality is, you should always be addressing frequency masking before you resort to panning. This is where mixing in mono really comes in handy.
By forcing yourself to work in mono, you have to work that bit harder to get every element to really cut through the mix. Now, this isn’t to say that you shouldn’t be using panning. Unless you want a mono mix, you’re going to have to use panning. However, by starting off in mono and achieving a great sound, you set your mix up to only improve when you go back to stereo. Additionally, you can ensure that the phase relationships are correct in the early stages so that when you introduce panning for width, you know it sounds great in mono and you don’t have to rely on stereo wideners. There’s no greater feeling than getting to the point where a mix sounds great and forgetting you were in mono, then switching to stereo and hearing the whole track explode at you.
The Process
My general outline for this approach is as follows. Start in stereo and set up a rough mix of your track just using the faders and pan pots. For instance, with a drum recording, I would start by setting sensible relative levels first. Next, I’ll pan my overheads out and place my spot mics in the stereo field. Now I mono the mix to identify phase cancellation and fix any major issues. From here, I can begin mixing in mono and trying to create a powerful and punchy drum mix. Finally, set the track back to stereo. Hear how the added space makes your drums sound huge while still being powerful. No phase issues and a great sound achieved.

TL;DR
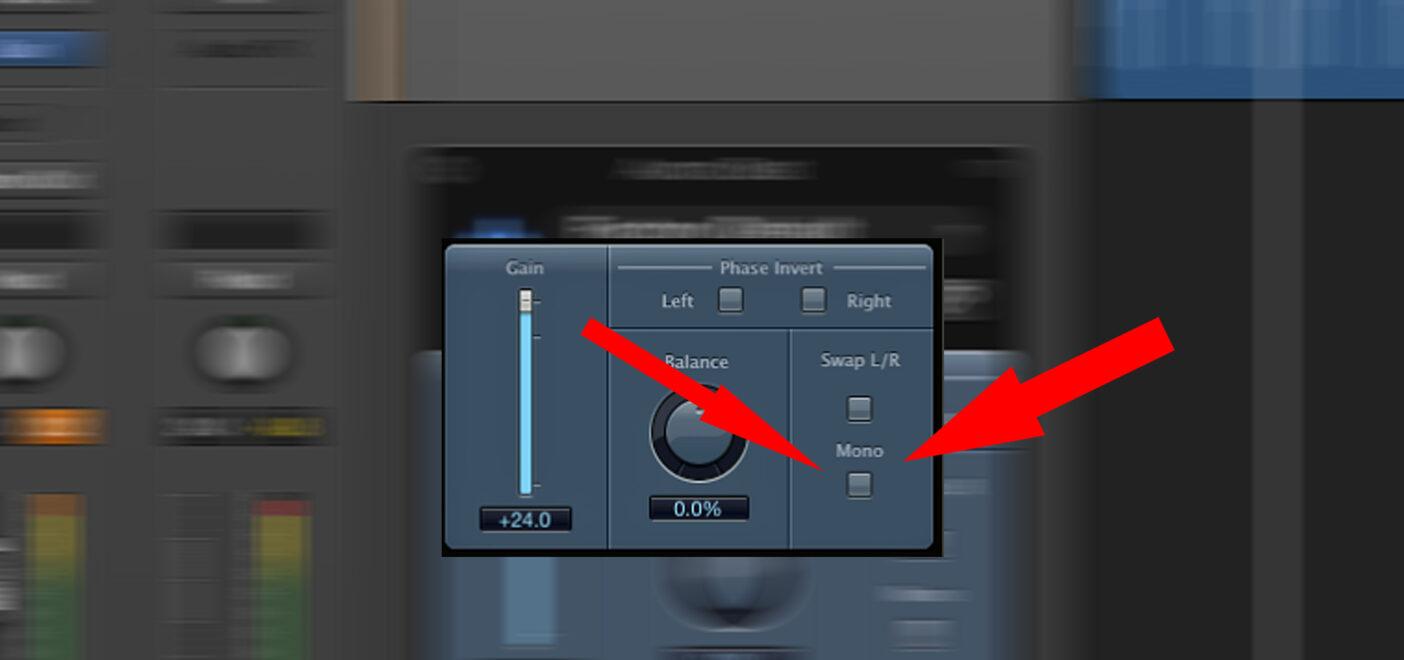
Mixing in mono is a really great tool to have in your arsenal. It lets you identify and fix phase issues as well as clean up your muddy mixes. It can be a great way to learn about depth mixing. In turn, this really helps in creating a wide mix. Most DAWs have a channel button or a plugin available to mono your mix. Logic has the gain plugin, which has a mono button. Ableton has the Utility plugin. Those of you with Focusrite gear can use the Scarlett MixControl, which also has a mono button. If you don’t have anything you can use, check out the DFX MonoMaker plugin.
Sobre el autor

Tim Dunphy
Ingeniero de sonido y redactor de contenidos especializadosMás de 10 años de experiencia trabajando en el sector del audio. De todo, desde enrollar XLR hasta masterizar álbumes. Soy un hombre hecho a sí mismo y mantengo mis activos en Bitcoin. ¿Qué más hay que saber?
Deja un comentario
Inicia sesión para comentar


