Mixing with EQ can present a host of challenges. Sometimes, making minor tweaks on the graphic or parametric EQ seems pointless; your ear becomes fatigued and desensitized. You may need a drastic push to hear what frequencies work and which need to go. Fortunately, there are tools for just these purposes: filters. But before you get too excited, there are quite a few filter types to grapple with. They each follow the same principle but should be used in different EQing scenarios. Let’s take a look at these filter types and learn how to use them properly.
What are Filters in Audio Production?
First things first, let’s go over exactly what filters are in the realm of audio. You likely already know what filters are in other spheres. If you make coffee, edit Instagram photos, or remember a thing or two about chemistry class, you know that a filter extracts a specific part (or parts) from a whole using a barrier. Your coffee filter only allows liquid to pass through to the pot. A photo filter alters the visual composition of the picture by removing unwanted colors, shades, saturation, etc. In the sciences, different-sized holes allow different types of sediment or matter to travel through a filter. The idea of any filter is to control what gets through, what remains blocked, and the degree to which this occurs.
Filters work the same way in audio production. A barrier is placed over the track so that only certain frequencies can pass through. These might be high frequencies, low frequencies, or something more specific. In addition to just removing certain frequencies, audio filters can also amplify them. Ultimately, filters serve as useful tools for making bold EQ decisions and cleaning up a muddy mix. So now let’s examine these filter types and what makes them useful.
Filter Types: High- and Low-Pass Filters
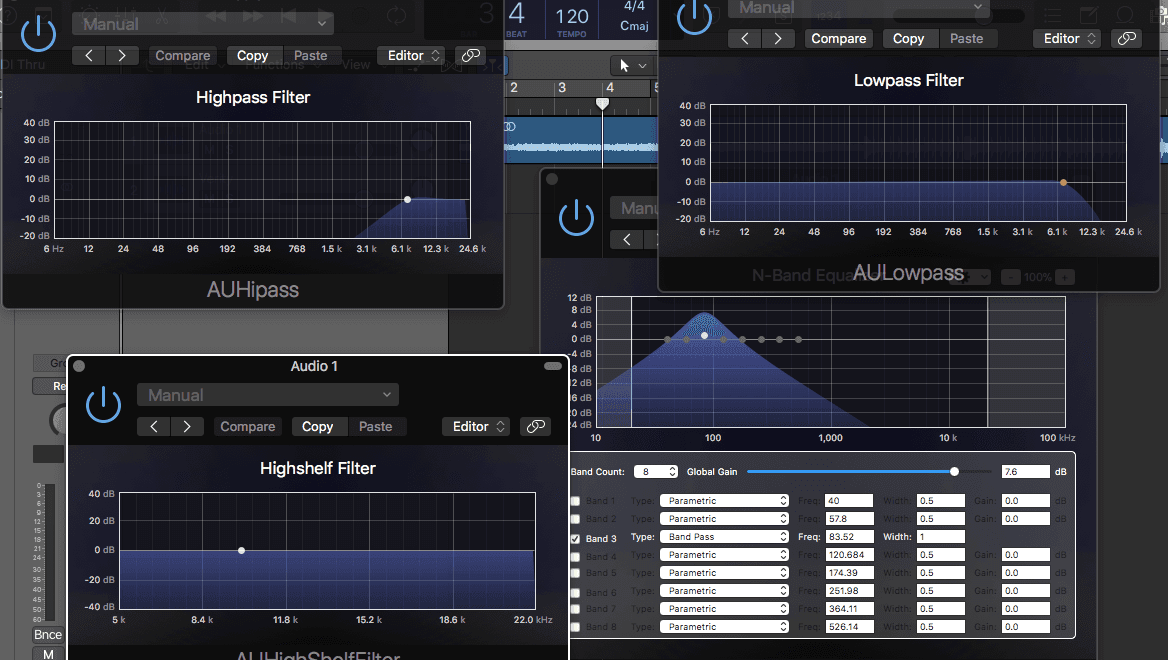
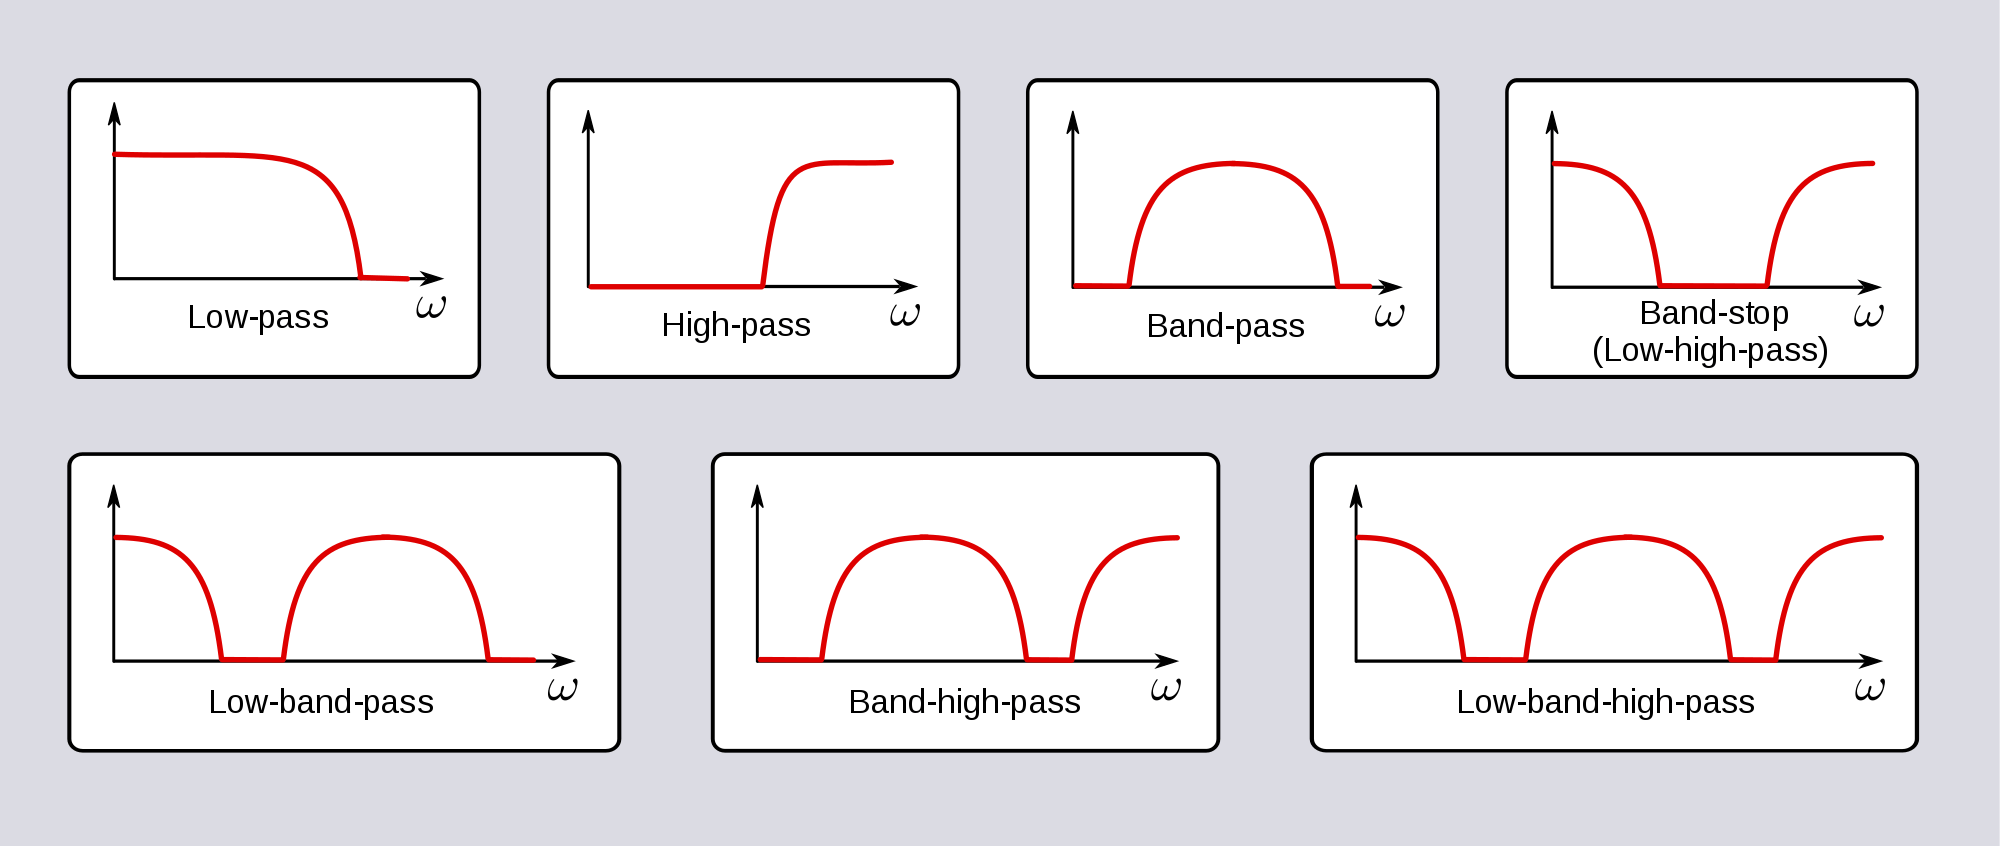
Pass filters are the most common of the audio filter types. These come in two varieties: high-pass (HPF) and low-pass (LPF). As the names suggest, these filters allow either high or low frequencies to pass through. With either type of pass filter, you first set a cutoff frequency. The LPF allows any frequency below that cutoff to pass through and attenuates (or cuts) anything above the cutoff. Conversely, the HPF allows any frequency above the cutoff to pass through and attenuates those below it.

High- and Low-Shelf Filters
High-pass and low-pass filters work wonders for tracks that need to stand out at the upper or lower end of the frequency spectrum. However, we don’t always want to remove all the high-end or low-end. This is where shelf filters come in handy. On the spectrum, shelves look like horizontal lines (makes sense, huh?). These lines act as bases for either the low-end or high-end. This means you can still use an LPF or HPF, but rather than remove the unwanted frequencies entirely, you simply lower their volume. Conversely, you can increase their volume as well by raising the shelf higher than the rest of the spectrum.
Bandpass Filters
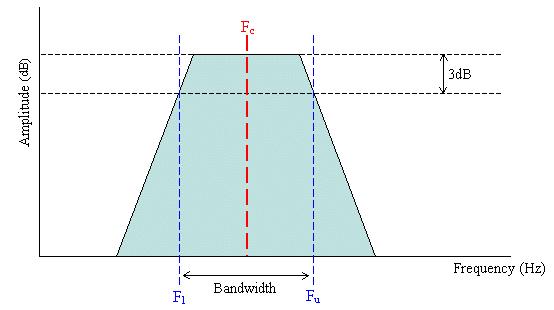
To hone in on a more specific frequency range, we use bandpass filters. The name bandpass refers to the bandwidth or range of frequencies selected on the spectrum. To use a bandpass filter, you first select the bandwidth (say 500-700 Hz). Frequencies within that range will then be boosted, while those outside the range are attenuated. A larger bandwidth means a low Q factor or a more gradual slope. A narrower bandwidth results in a high Q factor with a steep, sharp slope.
Peak and Notch Filters
These two filter types extend from bandpass filters but take them to the extreme. This is where the high Q factors come into play. Rather than just aim for a range of frequencies, peak and notch filters target one specific frequency. As you might have assumed, peak filters boost that specific frequency while notch filters attenuate it.
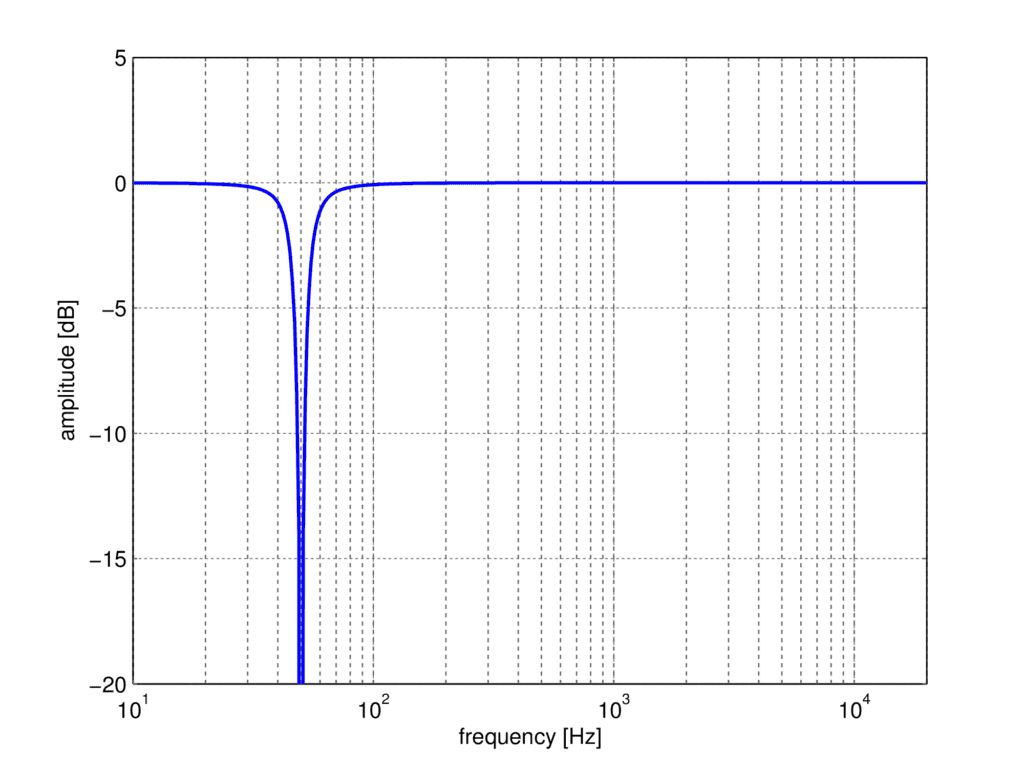
Maybe your track experiences a light hum at 60 Hz. You don’t want to completely lose the low end, but you need that hum reduced. A notch filter can work wonders to remove noise via subtractive EQ while keeping the surrounding frequencies intact. Likewise, if you want to boost one frequency without greatly altering the EQ, use a peak filter.
Conclusion
Filters really come in handy when mixing with EQ. While some tracks require a fine-toothed comb for EQing, filters allow you to make more sweeping EQ moves. So, if you know you want your bass track to really boom, you can slap on an LPF and then go from there. Don’t be afraid to experiment with filter types, either. The right filter can go a long way to add depth to your mix.
About the Author

Ethan Keeley
Writer, Voice Talent, Musician, and Audio EditorEthan Keeley is a musician, voiceover talent, and writer from Rochester, New York. When he's not on tour with his band Unwill he's working on new songs and stories.
Leave a comment
Log in to comment
